DIY

How To Tie Dye: A Guide in Techniques

unsplash-image-CH0Rho6deI8.jpg

Summer is almost here and with 90’s fashion becoming more popular among TikTok’s Gen Zs’ creators, tie-dye is all the rage. If you’re like us and love to scroll on TikTok for hours, you’ve probably come across a couple of tutorials on how to get the perfect tie-dye t-shirt or even sneakers! In this post we’ll take you through the different techniques to get the right result for what you’re trying to achieve.

How To Tie-Dye

We’ll show you different tie-dye techniques on this article that show you how to tie dye like a pro, but here are some tie-dye basics to help set you up for success! Whether you are wondering how to tie dye a T-shirt, how to dye socks or pretty much anything else, here are the basics to get you started.

Supply List:

  • Plastic Gloves

  • Rubber Bands

  • Easy-squeeze bottles with dye powder

  • Sealable plastic bad or wrap (for storing your t-shirt while the dye sets)

  • Disposable surface cover (like a large trash bag)

  • Wire Rack (to avoid your creating from sitting in a pool of dye)


Step 1: Pick your Item

There’s a long list of items you can tie dye, from t-shirts, socks, and sweats to bed sheets, or even shoes! We advise your select an item that is made from 100% natural fibers such as cotton, rayon, or silk. Synthetic fibers like polyester have different fibers that are not as absorbent and this can prevent the dye from dying your items completely.

It is recommended that you wash the item before starting the tie-dying process, especially if the item is new. Some dyes will require you to presoak the fabric in soda ash but with products such as Tulip’s One-Step Dyes, which already has the soda ash mixed into it.

Pro Tip: Do not use fabric softener when pre-washing your fabric. The chemicals in fabric softeners can block dye absorption.


Step 2: Prep the Dye

Some products such as Tulip’s One-Step Dye bottles already have the powder inside, but if you’re using another type of dye, now is the time to set up. Put the powder inside of your easy-squeeze bottles, then add tap water, ensure your nozzle is tightly screwed in and that the cap is on. Shape each bottle thoroughly until the dye powder has dissolved. Wait to mix your dyes until you are ready to apply them.

Pro Tip: Dye left in bottles for more than 72 hours might lose their concentration and may not appear as vibrant after dying.


Step 3: Bind the Item

Lay your damp item or t-shirt out onto a flat surface, make sure the surface has been covered with plastic. We’ll use a t-shirt and the spiral technique as an example, you will find the center of the tee which would be down the middle of the collar, and the section directly under the sleeves. That is your center point for your spiral.

Pinch the fabric in the center and twist the fabric towards the right until the entire shirt is bunched, making a perfect swirl. Use rubber bands to hold the spiraled t-shirt in place by crisscrossing them and creating 6 wedge shapes.


Step 4: Apply the Dye

Using the metal rack, place the t-shirt on to it above a covered surface to avoid making a mess. Wearing your gloves, proceed to apply the dye colors to each wedge created by the rubber bands. Turn the t-shirt and apply the same colors on the back to match the same colors as the other side.

Pro Tip: There’s no wrong way to tie-dye!


Step 5: Let Set

This is the longest step because you will need to let your creation sit for many hours. Place your project into a sealable plastic bag or plastic wrap to keep it damp and let the dye settle. Let your project sit 6 to 8 hours or overnight if you would like to give it some extra time. It’s important for the fabric stays damp while the dye sets, so make sure it’s stored in a cool area.


Step 6: Rinse and Wash

After it has been at least 6 hours and the dye has fully processed, remove the rubber bands and rinse, wash and dry. We recommend you air dry it or follow the instructions on the t-shirt tag.


7 Best Tie-Dye Techniques & Patterns

IMG_8984.jpg

Besides this being a fun activity to do with your kids or your friends over some beers, it can also be highly technical with many steps, that if missed, can throw off your design completely.


spire-tie-dye-shirt.jpg

The Spiral Tie Dye Pattern

This technique is one of the most commonly used and if you’re just getting started this is a good introduction to tie-dying. This technique is simple, pinch the center of the fabric and twist to create folds and then tie with rubber bands strategically then add the dye.


bleach-tie-dye-hoodie.jpg

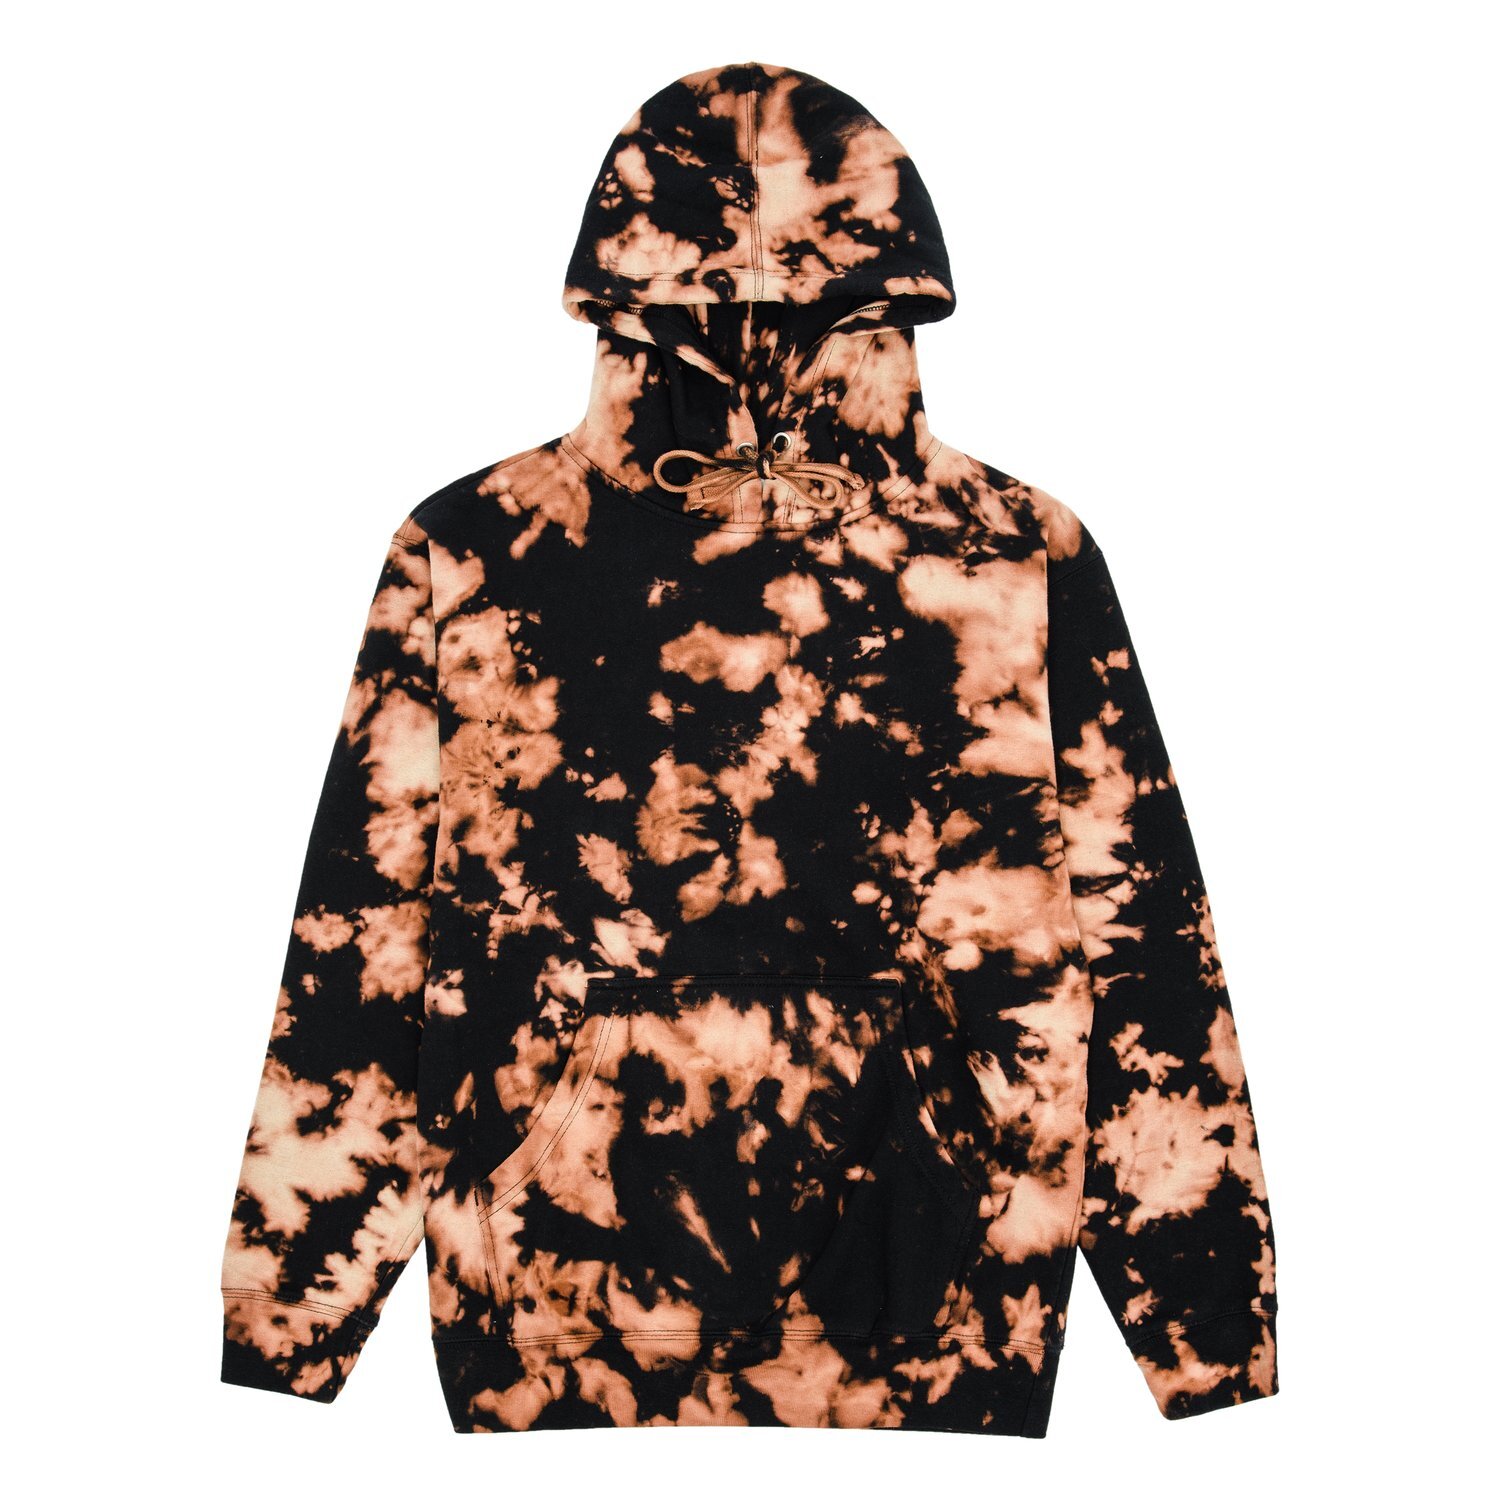
The Reverse Techniques (a.k.a Bleach Tie Dye)

This technique is called reverse or bleach because you’ll need a 100% cotton black fabric and bleach. For this technique, you’ll need to leave your shirt dry and crumple into a tight mound with the rubber bands. There’s no specific pattern to follow, this method is a little looser. Then, mix the bleach in an easy-squeeze bottle to then apply to your fabric. Rotate the fabric as needed while squeezing the bleach into it. Watch as the bleach begins to strip the color of the fabric and gradually remove the rubber bands to then immediately rinse and wash according to instructions.

Once the fabric has been washed, leave it damp and lay it flat on your workstation which should be covered with plastic to avoid making a mess. Then apply the chosen dye colors randomly over the fabric, especially in the lightened sections that were created from the bleach. Once done, put the fabric into a resealable plastic bag and leave it in a cool dry place for 6 to 8 hours. Then rinse and dry.

Shibori-Tie-Dye-shirt.jpeg

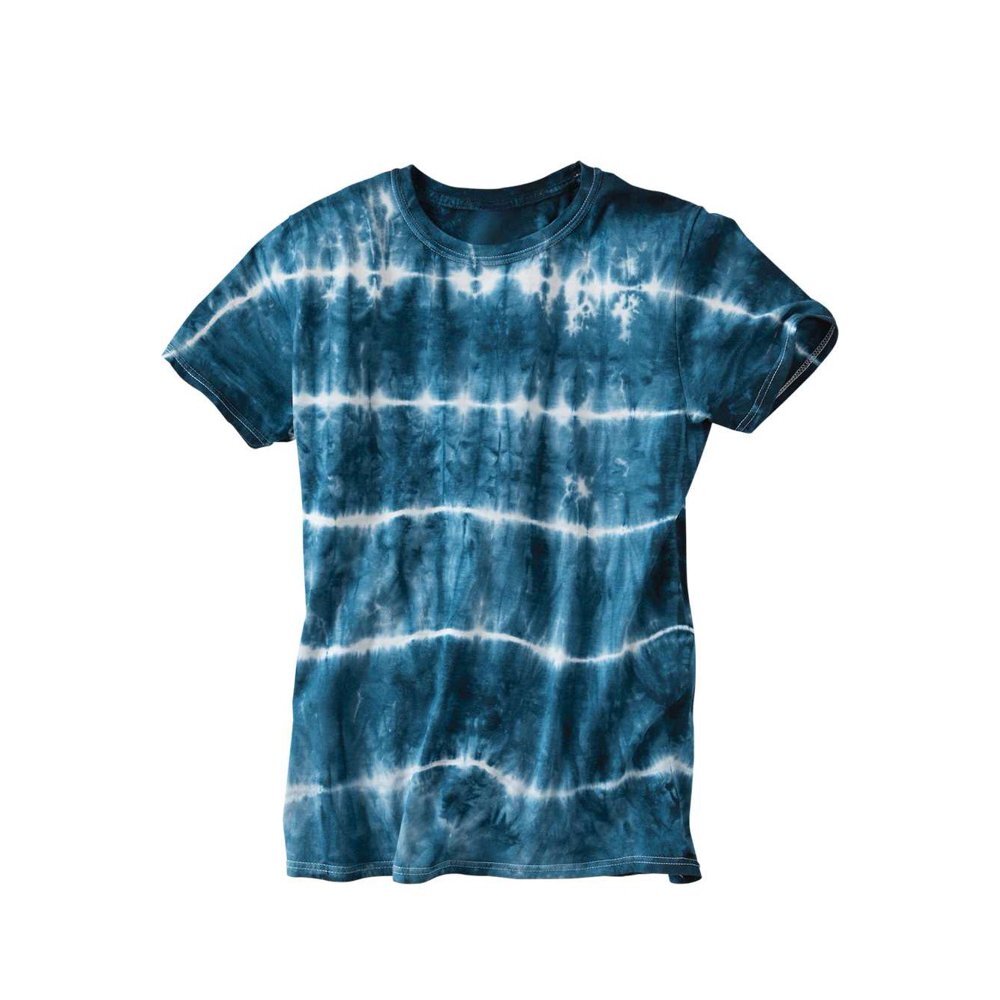
The Shibori Tie Dye Pattern

This technique is all in the way the fabric is folded. For this technique, we will use a t-shirt as an example. Accordion fold the t-shirt from the bottom edge up towards the collar of the shirt in even folds. Once folded up, starting on the end of the folded shirt, accordion fold it again towards the opposite direction until you reach the other end. Wrap the rubber bands tightly around the folded shirt in each direction, crisscrossing the rubber bands.

Place the folded t-shirt on the rack and begin to squeeze the dye into the fabric on each side. For this technique, indigo blue color dye is usually used. Place the shirt in a sealable plastic bag for 6 to 8 hours or overnight. Once the dye is fully processed, cut away the rubber bands and rinse, wash and dry according to your instruction guide.

ice-dye-tie-dye.jpg

The Ice Dye Technique

This technique requires literal ice. The pattern from this technique is very recognizable as it’s one of the most popular. The first step is to damp your fabric in soda ash or the Tulip One-Step tie-dye, then lay your damp fabric out flat on your covered work surface. For this technique, the crumple tie-dye pattern is the most commonly used and worst great, but you can experiment with other patterns you want. After using the rubber bands to bind the fabric, place it on a rack (over a bucket or a bowl is recommended to catch the dye as the ice melts). Then cover the fabric with ice, make sure all of it is covered, the more the better.

After covering the project in ice, sprinkle the dye powder randomly over the ice. The ice will melt and help the dye absorb into the fabric. Depending on where you live and the weather temperature, it could take a while for the ice to melt or not much time at all. If the ice melts quickly, you can then place your project into a sealable bag and allow the dye to set for 6 to 8 hours. If it takes about this long for the ice to melt, it’s time to skip the bag and move on to the next tie-dye step which is rinsing and drying.

spider-tie-dye.jpg

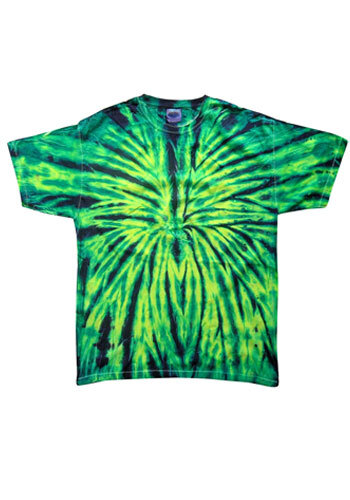
The Spider Tie Dye Pattern

For this technique, you will start with a damp fabric and then fold it in half. Pinch the fabric where you would like the center of the spiral to be, then twist until the entire fabric is spiraled. Bind the spiral with three intersecting rubber bands to create six wedge shapes. Apply a different color of dye onto each wedge shape and then carefully flip spiral over and apply the same colors on that side.

Apply black dye to one side of the spiral, completely covering the other colors. Cover with a plastic wrap to keep damp and let it sit for 6 to 8 hours. Then rinse thoroughly and wash separately.

Kaleidoscope-tie-dye.jpeg

The Kaleidoscope Technique

For this kaleidoscope pattern, you will start with a damp fabric and fold it in half, if using a t-shirt, fold it in half lengthwise and press flat on a tabletop. Pinch the fabric where you would like the center of your first spiral to be, then twist the fabric a few times to create a small spiral.

Maintain the first spiral while pinching another section of the fabric and twist several times to create a second spiral. Then crumble the remaining fabric towards the spirals. Bind the fabric with rubber bands to hold securely. Then make a paper ring to fit around the bound fabric and this will help keep the ice in place when dying.

Instead of adding water to dye bottles to mix, squeeze dye powder of a few colors on top of the ice, then let the ice melt and remove the paper ring. Flip the shirt over and repeat the process on the backside with additional dye powders. Once the backside has been dyed, cut off the rubber bands, then launder according to instructions.

Firecracker-tie-dye.jpeg

The Firecracker Pattern

Scrunch damp fabric into a tube shape and wrap a rubber band around it at about a third of the way down from the top. Repeat on the bottom third. Add the dye to the top third of the fabric above the rubber bands. Then add Blue dye onto the bottom third of the fabric below the rubber band. Then wrap with plastic and let sit, then rinse and wash accordingly.
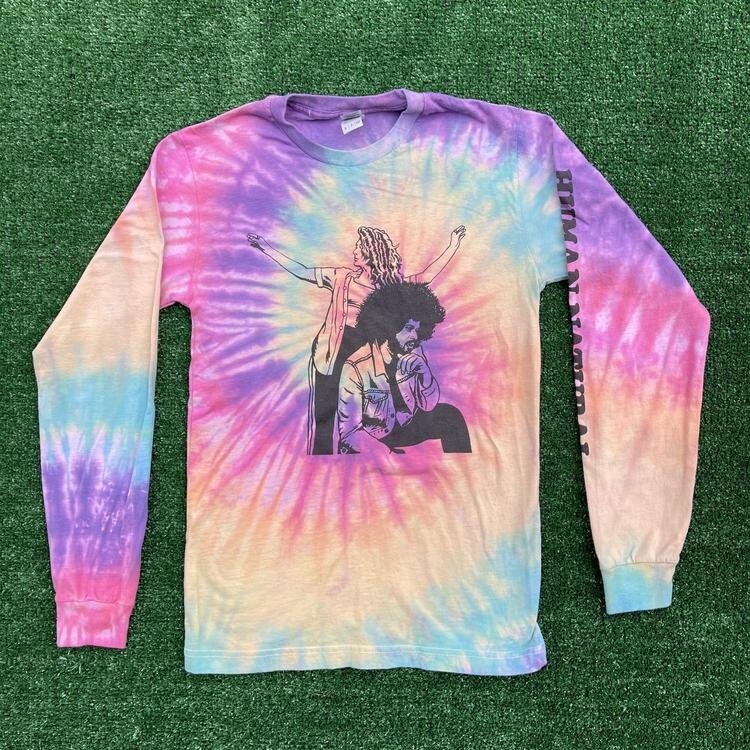


Dip-Dye-tie-dye.jpg

The Dip-Dye

Dip-dye (also known as tip dyeing) is a technique that involves dipping the ends of the fabric into dye. Dampen the fabric in preparation for dying then mix the dye of your choice and pour into separate plastic bins of bowls. Dip one side of the fabric into the first color, then squeeze out any excess dye back into the container. Dip the other side of the fabric into the second dye color making sure both dyes don’t touch. Lay the fabric flat on a rack and cover it in plastic wrap. Then let it sit for 6 to 8 hours. Rinse, wash, and dry.


Brand Spotlight:

LXIX Apparel

LXIX-APPAREL.jpg
IMG_5614_750x.jpg

While we at Family Industries do not do this type of customization, we have done projects with tie-dye by having help from LXIX Apparel which is a tie-dye haus located in Los Angeles and run by Brian Robert Jones, who is the guitarist for the band Vampire Weekend.

LXIX Apparel focuses on creating vibrant tie-dyed apparel from hoodies, and t-shirt, to full sweatsuits. LXIX has helped us with projects for Urban Farms LA and we have printed for their own brand as well.

IMG_3690_750x.jpg
IMG_3944_750x.jpg

Author: Irene Floridia - Content Creator


Follow us on Instagram and Facebook!

For FAQ, check out our site!

For any inquiries, send us a message!

OR

send us an e-mail at quotes@familyindustriesla.com

Our showroom at 2755 Fruitdale Street, Los Angeles, CA 90039 is open by appointment only from 10 am - 4 pm Monday through Friday.

Screen Printing 101: Techniques

IMG_4835.jpg

So you’re wondering what it would take for you to be able to make your own print? or you’re wondering how Family Industries makes perfect prints? We’ll take you through the steps necessary to achieve a flawless screen print as well as show you how we do it at the Family Industries HQ.

In this article, we will also take you through the different techniques used for specific outcomes and all that will be necessary for you to achieve them which would include equipment and other factors such as time and effort.

How To Get Started

We’ll take you through the fundamental tools you will need to begin this process. Although you can buy ready-to-use kits from websites such as screenprinting.com - you can always find DIY ways to make your own setup.

Check out Create Custom Screen Printing Designs at Home

43429-group3ww-l.jpg

The Screen

Choosing the right screen mesh can be confusing, a 110 to 160 mesh count screen is the most versatile and the most commonly used in screen printing. We recommend that for prints that are up to 3 colors a 160 (61cm) to 180 (70cm) monofilament mesh screen is best, ensure that they have very well made wood frames that have been purchased with the fabric or mesh already attached (pre-stretched) OR you may also use a metal retentionable screen.

Here’s how to make your own screen

press-starter-blue-1-xl_1_500x500.jpg

The Press Set-Up

The screen needs to be placed on the press and squared to the shirt board. This is as simple as placing a t-square under the frame and looking through the screen to square the image on the frame to the edge of the board. Now when you make a print it will be straight to the board.


green-galaxy-cryocoat-gal-min-xl_1_500x500.jpg

Emulsion

A big part of the photostencil phase of the production cycle, screen printing emulsion is the light-sensitive liquid or capillary-direct films that you coat or adhere to the degreased screen fabric prior to taping your film positives in place.

There are a few choices to pick from when it comes to getting the right emulsion and it has to do with certain variables. Learn about what type of emulsion you will need according to your setup and experience level.

printing-ink-500x500.jpg

The Ink

Most inks on the market are too thick to print easily by hand and they generally need a slight amount of reduction – or thinning – to make it work better. Thinning does not mean making it softer it means adding a curable reducer rather than a "soft hand" additive. A small amount of reducer will make the ink more workable.

If your print is a three-color print, it is recommended to thin the lightest colors a little more than the darker colors. This will generally be the first color in your print and it needs to penetrate into the garment more than the others, this way, it will not pick it up on the bottoms of the other screens. If black is your last color, you can thin it less. It needs to lay on top of the other colors and it will blend in with the under colors if it is too thin.

Plastisol ink tends to get a little thicker when it isn't in use, so you should always stir the ink before you begin thinning it. By stirring the ink you will find out if it really needs thinner. We recommend an ink that is smooth and creamy to one that is so thick that you break the stick trying to stir it.

Beta-Chemical-Screen-Squeegee.jpg

The Squeegee

We highly recommend a triple durometer squeegee that has a harder center around a softer outer edge. These give you more control, especially if you have a lot of strength and try to flatten the blade as you make the print (you don't want to flatten the blade). You can also pick up an "old-fashioned" medium hardness blade with a sharp edge and make a great print. A sharp edge shears off the ink cleanly and will make a sharper print than a dull edge blade. If you are a messy printer, you should use the wider 5" handles. These will help keep your fingers out of the ink.

Choose the right squeegee for your screen print job

Techniques

There are technical applications we recommend and we’ll go over details as to how to print once you have your equipment all set up and ready to go.

IMG_6712.jpg

How Much Ink Should I Use?

Depending on how you work, knowing how much ink to use takes time and practice. Some people have a heavy pour but they are able to manage the printing process to avoid making a mess, while others tend to be a little less coordinated. The rule of thumb is to pour enough to get a good amount of prints without running dry, but not so much that when you print it all rides up onto the squeegee handle. It is much easier to put more ink on a screen and harder to take the excess out! Start off with a small amount and work your way up to learning how much is really needed and how much you can handle.

How Do I Hold The Squeegee?

Top Grip:

A lot of printers use the standard “two-hand, top grip and pull towards you” stroke. While this works well, it can cause some problems if you are printing all day long. Not only will the tips of your fingers and thumbs be sore (and may become numb) you may also feel tenderness in your wrists. What this could cause is a repetitive motion disorder known as Carpal Tunnel Syndrome.

Some people can print their whole lives and never get this but to minimize the chances of developing Carpal Tunnel, you can use special ergonomic squeegees that force you to hold a wider handle.

Side Grip:

This technique moves the strain from the center of your wrist to your forearm muscles. Simply hold the squeegee by the side and pull it towards you. This works great if you are a short person or of average height.

Push or Pull?

The answer to this question is based on preference. Pulling the squeegee towards you is the standard method, but pushing it away from you is really a lot easier. When pulling the squeegee you use more of your wrists and shoulder muscles. When pushing, you use more of your body weight to push the squeegee. We encourage you to try both and figure out what is most comfortable.

How Many Strokes Are Needed?

You really only need one stroke if your ink is diluted enough and you’re printing on a lighter fabric. If the fabric is dark and your ink isn’t sticking as well as you’d like, we encourage you to do two-stroke. If you find that two or three strokes are not doing the job, it may be that your ink is too thick and will need to be diluted a bit more.

How Much Pressure Do I Apply?

We recommend that not a lot of pressure is applied as this can cause the print to be uneven, if the ink is the right consistency then a medium amount of pressure should do the job.


In Conclusion

Having the right equipment is more than half of the job - buying the equipment and the ink can get expensive, however, if you have a plan and the right design, you can make up the money quickly and begin to profit from your creations.

Practise makes perfect, many techniques can be mastered by just making mistakes and starting over. So, don’t be scared to make errors and having to start over, it’s all part of the process.

Author: Irene Floridia - Content Creator


Follow us on Instagram and Facebook!

For FAQ, check out our site!

For any inquiries, send us a message!

OR

send us an e-mail at quotes@familyindustriesla.com

Our showroom at 2755 Fruitdale Street, Los Angeles, CA 90039 is open by appointment only from 10 am - 4 pm Monday through Friday.

DIY Screen Printing on a Budget

Screenrpint.jpg

So you have a great design and you want to make t-shirts but you’re on a budget and can’t afford a minimum order from a local screen printer? Well, you can get your own setup on a limited budget and we’ll show you how. In this article, we will take you through the essential materials and how to outsource some of those expensive items.

Screen Printing: The Essentials

These are the materials you will need to have a basic setup, later on, we will give you resources on how to either make your own, where to find a good deal, or best practices on how to waste less to get more.

  1. Screen - The screen has a mesh, which is the fabric stretched over the screen’s frame, and is a weave that has tiny holes in it, which allows the emulsion to harden and adhere to it, and also allows ink to pass through the mesh that is open, IE the stencil. The common sizes are 18″x20″, 20″x24″, and 24″x31″, but there are companies willing to make screens to any size needed.

  2. Press - The press holds the screen in place between prints, making it easier for the user to swap out the paper or clothing being printed.

    Learn more about Choosing the Right Screen Printing Press

  3. Photo Emulsion - This is a thick liquid substance that reacts to light. Essentially, emulsion becomes "tougher" when exposed to light, making it more difficult to remove from surfaces. The emulsion is applied to the screen, at least one layer on both sides, using a scoop coater.

  4. Stencil - Stencils are basically opaque sheets, similar to transparency sheets, that the designs are printed onto using a laser printer. The design needs to be as dark as possible so that it blocks UV light from the exposure unit to the areas behind the design. Learn How To Screen Print with Stencils

  5. Ink - We recommend using water-based ink to have the best result. Water-based ink is friendly to the environment, stays longer wet on the screen, and requires little chemicals for cleaning. This ink requires technical expertise. Another option is plastisol based Ink. This ink was the most common choice for a long time because water-based ink is more difficult to use, therefore requiring printing expertise.

  6. Squeegee - A squeegee is a rubber blade attached to a long wooden, metal, or plastic handle. It’s used to push the ink through the mesh screen and onto the surface being printed.

  7. Darkroom Light - For this process, you will need a darkroom to be able to apply and mix your emulsion. A darkroom-safe light is necessary to be able to see while you’re preparing the screen.

  8. Exposure Light - After coating your screen with emulsion, it’s time to place your stencil on it and expose your design using an exposure light.

Check out The Art Of Making: Hand-Screen Printing


But How Do I Print on a Budget?

IMG_7366+2.jpg

We get it, the materials list is long and it’s not looking cheap! - Don’t worry, we got you! Here’s how you can cut costs on your materials.

Tip: You can almost always find some of the materials listed above on websites such as Craigslist, OfferUp, or Facebook Marketplace. This is a good way to get exactly what you need without paying full price.

Screen

With the price of lumber being low, building your own frame can be cost-effective, although screens are fairly affordable. Screens for screen printing range in price from $20 to $35 dollars, however, if you are making a print requiring more than one screen, this can get pricey. We recommend that if you’re just starting to only get one screen and begin printing single color prints.

Screen Printing Press

A press is the most expensive part of this process, it can run you anywhere from $100 to $1,200 dollars but you don’t have to have a press. Many printers have simply used a screen on a table and applied pressure with one hand while printing using a squeegee with the other. The trick is to make sure the t-shirt is placed always in the same spot.

Now, if you’re doing a large print and it requires a little more concentration, we suggest you set up on a table that you don’t mind drilling a hole into, and add door hinges to your screen and the table - this will prevent your screen from moving and you can use both hands while printing.

Ink

Inks can get pricey, but as we recommended, you can find this on Apps like OfferUp or Facebook Marketplace. Otherwise, a way to conserve ink is to minimize your use by pouring smaller amounts when printing and keep pouring as you go. This practice will prevent you from wasting ink.

Learn about What is the Best Ink for Screen Printing

Squeegee

Squeegees are very affordable and you can find a whole kit for less than $10 dollars if you buy directly from a wholesaler.

Darkroom Lighting and Exposure Light

The best way to work with the photo emulsion is in safelight conditions. A darkroom safe light lets you work with the photo emulsion in safelight conditions so that you can see what you’re doing when mixing the emulsion and coating the screen without exposing it to UV light. Because film photography is not as popular anymore, you can find a lot of Darkroom-safe lights on websites such as eBay for $20 dollars.

For exposure lights, you can go to your local hardware supply store and find 500-watt or higher halogen work-lights anywhere from $20 - $40 dollars. They generally have a black housing and clear glass lens at the front with a wire grill covering it. Start by removing the grill and glass from the front. It is a UV filter and when you expose your artwork to your screen you will want maximum UV exposure. This is a great alternative DIY exposure setup.

For a more in-depth list of screen printing materials, check out What is Screen-Printing and What Materials Do I Need?

Author: Irene Floridia - Content Creator


Follow us on Instagram and Facebook!

For FAQ, check out our site!

For any inquiries, send us a message!

OR

send us an e-mail at quotes@familyindustriesla.com

Our showroom at 2755 Fruitdale Street, Los Angeles, CA 90039 is open by appointment only from 10 am - 4 pm Monday through Friday.

How To Design a Statement T-Shirt

unsplash-image-D1QI9bx8KUM.jpg

As individuals we all have a lot to say and we’re constantly looking for ways to share our opinions and thoughts about social issues, politics, and our own identities. A statement tee is a great way to share your thoughts without having to say a single word. A statement tee also helps you identify people that are likeminded and can become a way to meet new people and share common ideals. In this article we’ll show you how design the perfect statement tee.

The Statement

unsplash-image-bEchRxSFYyw.jpg

Statement shirts are the perfect choice to highlight any outfit or occasion. Whether you are just trying to spruce up a casual look or you want to down play your evening look, a statement shirt almost always fits. A statement t-shirt doesn’t always have to be something serious, it can be printed with funny quotes, inspirational quotes of your favorite celebrity or a funny drawing, the choice is up to you and you’re imagination and opportunities have no limits.

The Design

IMG_1707.jpg

Don’t overthink it - the more simple your concept is, the more relatable it will be. To come up with the best statement think of all the things or ideals that you strongly believe in and put those believes into 2 or 3 words. You can also convey your message by creating a single graphic.

If you own an apparel business and are looking to create a buzz around your idea, creating a graphic tees with a message can also be effective and look more appealing. A statement tee can also include pop culture references, which tend to be more widely recognized.

Pro Tip: If your design includes a font or typeface, making sure it’s easily legible.

The Print Process

IMG_0002.jpg

Once you have a design locked in, it’s time to decide what type of printing and what type of ink you will use for your design. Here is a guide to help you with your options.

Print Options

  • Screen Print - This is the gold standard of t-shirt printing. The screen printing method is the most widely used because of its’ effectiveness and durability. It is also affordable when printing in bulk as it most often a minimum is required.

  • Direct To Garment - Also known as DTG printing, this method uses the freedoms of inkjet printing, but prints directly on fabric. Generally, this option is more affordable than screen printing as it requires less setup, specifically if the print has more than 2 or 3 colors. This method is also best when printing a small amount of t-shirts and if the design is highly detailed or is a photo image.

Check out Screen Printing vs. Digital Printing

Inks & Effects

s307002564771447779_p37_i3_w1080.jpeg
  • Plastisol - This is the standard ink used in screen-printing. It is the most long-lasting type of ink.

  • Foil - This ink is shiny and reflective, mostly used in specialty prints where you have a metallic or a gold color.

  • Water-based - This type of ink is engrained into the fabric, unlike plastisol that sits on top of the fabric. This ink is also better for the environment.

  • Puff - This type of print requires an additive that is applied to ink. This additive rises when it is exposed to heat, making the print “puff up” on the garment.

Learn more about What is The Best Ink for Screen Printing

Color

Canva - Colors palette.jpg

Considering the colors before the design process is complete may help you budget for your production. The more colors your print has, chances are, the more it will cost you to print. Figuring out what type of print you will use is the first step, if your prefer method is screen printing, then we recommend you take into consideration that if your design contains a lot of colors, this will require a bigger set-up cost for each screen.

By choosing the direct to garment print option your cost will most likely not go up if you have a lot of colors, however, you will sacrifice durability.

In addition to dictating the cost of printing, color can also dictate the color of the t-shirt.

T-shirt designs have two sets of colors to keep in mind: the fabric color(s) and the print color(s). To make sure that these two complement each other, always use your fabric color as the background of your design ideas.

Learn more about the Pros and Cons of Screen Printing vs. Digital Printing

T-Shirt Type

types-of-tshirts.JPG

Work with your printer to find the right fabric and t-shirt style for your design. You should also consider your customers such as what type of t-shirt style is most popular among your demographics? and what price point is most attractive for your customers? that questions specifically will help determine the t-shirt quality you will need to purchase.

Find a Printer

31A388A2-3469-40DF-B89A-9D7A12E8FFD8.jpeg

Finding a print shop can be an easy google search, but finding a GOOD printer can be a little more diffucult.

So how do you know if a print shop is good? Don’t just look for the best deals, you should also consider the printer’s reputation. Check for customer reviews, check their social media such as Instagram for examples of their work. Remember, the print shop does not always have to be local, if you find a printer outside of your city or even state, ask them about their shipping rates prior to placing your order.

You can also tell if a print shop is good based on their customer service and how much help they provide for setting up your files. File setup can be a little complicated, so a print shop that offers to help with this task is a plus!

Check out How To Prepare a Design File For Screen Printing

Besides the technical file setup, find a print shop that has an in-house art department. This will demonstrate that they are capable of assisting you on your design to achieve the best print possible.

Author: Irene Floridia - Content Creator


Follow us on Instagram and Facebook!

For FAQ, check out our site!

For any inquiries, send us a message!

OR

send us an e-mail at quotes@familyindustriesla.com