screen print

A Guide To Streetwear Design

image.jpg

Designing artwork for a t-shirt or a hat may seem like a simple task, but when it comes to the technical application of the design; things may get complicated. The road to starting your own streetwear brand does not have to be bumpy! we encourage you to inform yourself before investing time and money, and we will help you by taking you through the different steps to consider when creating and designing your own apparel brand.

In this article, we will walk you through efficient and economical ways to begin a streetwear clothing line as well as the technical part of apparel printing to help you avoid having to re-design your logo or any other artwork you would like to print on t-shirts, hats, or pants.

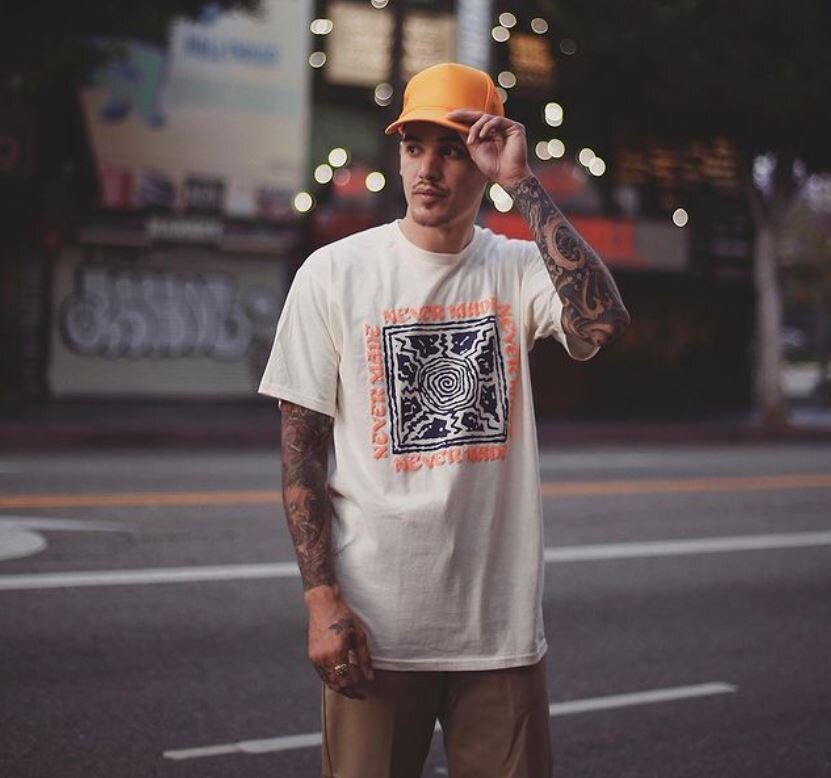
Photo and T-Shirt Design By NEVER MADE

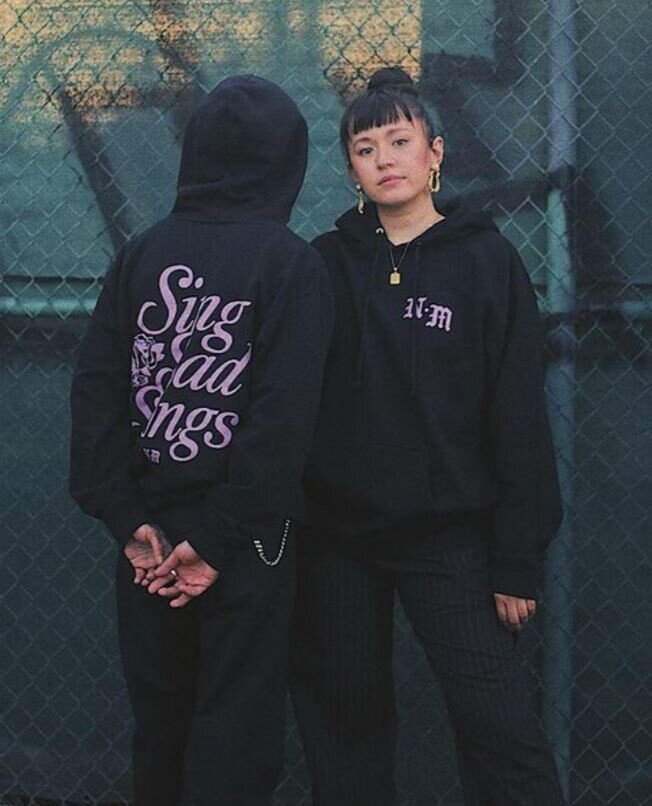
Photo and T-Shirt Design By NEVER MADE

What Is Streetwear?

Streetwear is a casual fashion style that became popular in the 1990s. It includes comfortable yet trendy clothing such as graphic tees, hoodies, sweatpants, and sneakers. Streetwear brands are inspired by both hip-hop culture and skater style. Followers of the latest trends in streetwear are known as hypebeasts, and many go to great lengths to acquire limited-edition designer hats, hoodies, sneakers, and more.

The first streetwear brands emerged in Southern California in the 1980s, when surfers sold screen printed T-shirts to promote their hand-shaped surfboards. Inspired by the street style of LA skateboarders and surfers as well as hip-hop fashion, small skateboarding shops in NYC started creating their own designs in the 1990s.

In the 2000s, sneaker culture influenced streetwear fashion. Hypebeasts paired their graphic tees with athletic sneakers, and collaborations flourished.

In the 2010s, luxury streetwear was born. As young people and social influencers made streetwear an important part of pop culture, and the fashion industry noticed, from mainstream sportswear brands to high fashion brands, got in on the action.

The Basics

image.jpg

Comfort

As mentioned, streetwear takes inspiration from the hip-hop culture as well as the skater style. When figuring out the fit of your apparel, you will first want to think about whether you’re looking to design loose and comfortable pieces or have more of a tapered look.

Streetwear is generally defined by breaking the rules of proportion by using oversize t-shirts with skinny jeans or dropped-crotch sweatpants, but as the style evolves, it is encouraged to just make cool and interesting apparel regardless of fit.

Ripped pants and distressed jeans are also part of the streetwear style, these details are important to the overall look. Considering what type of fit and style gives you brand identity and consolidates your audience to a specific group, which in turn, will help you narrow down your marketing efforts in the future.

Fabrics & Design

Because t-shirts are one in a million, and cool graphics are being designed and printed daily; good high-quality fabrics will set you apart from the competition and give your brand an edge. If this is something you can afford, we highly recommend going with higher quality cotton.

Cotton fabrics are premium options and ideal for long-lasting apparel. Additionally, the thicker the fabric, the better the graphics will be. The thicker fabric allows for a cleaner and nicer print, whether you’re screen printing the design or opting for a DTG print (direct to garment), a nice cotton blend is what you will need.

The design will depend on what your brand is about. Considering the name and the inspiration behind your brand as well as finding a compelling way to translate your passion for the brand into a cool graphic is key, and that same sentiment should show throughout each article of clothing and each collection thereafter.

We recommend that you stick to one logo and that logo be visible enough on all articles of clothing offered by your brand. The graphic design should be easy to read and recognizable. When designing the graphics, seek inspiration from your life, your surroundings, or the culture within your community. Having a design that directly connects to a certain lifestyle is what makes a streetwear brand successful.

Versatility

When creating your own apparel brand, especially in the streetwear category, you want each piece to be versatile. Versatility means that you can wear that article of clothing with many other pieces to allow the buyer to create their own unique look and keep their originality.

You can achieve versatility by including basic colors such as white, black, or grey. Minimal designs such as your logo embroidered small on the chest or your logo screen printed on the back of a t-shirt.

The Details

Accessories are essential to completing a look. There are simple accessories you can offer, such as hats, beanies, and bandanas to complete a unique outfit.

Screen printing a hat or a bandana is fairly easy and affordable, and are a good way to add accessories to your clothing line. Additionally, embroidering a logo on a hat or a cross-body bag is a good alternative that provides an added touch of customization and quality.

Focusing on the smaller details can make all of the difference in setting your brand apart from others, such as printing on unconventional spots like the sleeves or adding an embroidered element to the design.

image.jpg
image.jpg

Screen Print or Direct To Garment?

There are many differences and similarities between these two methods of printing, and there are a number of criteria to be taken into consideration when making your decision. The following points will help you decide on which print method is better for your brand and more specifically what type of print method is best for your designs such as logo and other artwork you wish to display on the apparel.


  1. Quantity: Digital printing allows for a smaller quantity to be printed while screen printing will usually require a minimum.

  2. Apparel: Screen printing has more versatility when choosing your fabric. For digital printing, it is advised to print on 100% cotton or other select cotton blends and only certain colors.

  3. Design: Photographs or hyper-detailed images with a lot of colors are usually better printed digitally. However, if you have a large number of shirts you would like to print, screen printing may still be an option but it may cost you a little bit more or may require some adapting to make the design work best.


If cost is your main concern, the following criteria will dictate the best print method:

  1. Apparel: The type of apparel can range from value to premium options and depends on the style and brand.

  2. Print Locations: There is the option for 1 or 2 locations, which would be the front and/or the back (for a t-shirt or sweatshirt).

  3. Fabric Color: For screen printing on darker color fabrics, a white layer before your print is necessary and may cost a little bit more.

  4. Number of Colors: The more colors your print requires the higher the cost is for screen printing, however, if you have a large quantity, this cost may be a lot lower as you can have access to deeper discounts.

  5. Quantity: With screen printing, the number of pieces will dictate the majority of your cost. This is the most important factor that will most likely dictate the right method for you.


Streetwear Brand Spotlight:

Never Made is a Los Angeles based streetwear / lifestyle brand created by artist Francisco Reyes, Jr.

Never Made is a Los Angeles based streetwear / lifestyle brand created by artist Francisco Reyes, Jr.


Remember!

When people look at you as a “high-quality” streetwear brand, you’ll not only be able to charge more money, but you’ll be much more reputable in the process. Reputation can take you a long way in the fashion industry, especially when it comes to something as urban as streetwear.

Author: Irene Floridia - Content Creator


Follow us on Instagram and Facebook!

For FAQ, check out our site!

For any inquiries, send us a message!

OR

send us an e-mail at quotes@familyindustriesla.com

Our showroom at 2755 Fruitdale Street, Los Angeles, CA 90039 is open by appointment only from 10 am - 4 pm Monday through Friday.

Screen Printing 101: Techniques

IMG_4835.jpg

So you’re wondering what it would take for you to be able to make your own print? or you’re wondering how Family Industries makes perfect prints? We’ll take you through the steps necessary to achieve a flawless screen print as well as show you how we do it at the Family Industries HQ.

In this article, we will also take you through the different techniques used for specific outcomes and all that will be necessary for you to achieve them which would include equipment and other factors such as time and effort.

How To Get Started

We’ll take you through the fundamental tools you will need to begin this process. Although you can buy ready-to-use kits from websites such as screenprinting.com - you can always find DIY ways to make your own setup.

Check out Create Custom Screen Printing Designs at Home

43429-group3ww-l.jpg

The Screen

Choosing the right screen mesh can be confusing, a 110 to 160 mesh count screen is the most versatile and the most commonly used in screen printing. We recommend that for prints that are up to 3 colors a 160 (61cm) to 180 (70cm) monofilament mesh screen is best, ensure that they have very well made wood frames that have been purchased with the fabric or mesh already attached (pre-stretched) OR you may also use a metal retentionable screen.

Here’s how to make your own screen

press-starter-blue-1-xl_1_500x500.jpg

The Press Set-Up

The screen needs to be placed on the press and squared to the shirt board. This is as simple as placing a t-square under the frame and looking through the screen to square the image on the frame to the edge of the board. Now when you make a print it will be straight to the board.


green-galaxy-cryocoat-gal-min-xl_1_500x500.jpg

Emulsion

A big part of the photostencil phase of the production cycle, screen printing emulsion is the light-sensitive liquid or capillary-direct films that you coat or adhere to the degreased screen fabric prior to taping your film positives in place.

There are a few choices to pick from when it comes to getting the right emulsion and it has to do with certain variables. Learn about what type of emulsion you will need according to your setup and experience level.

printing-ink-500x500.jpg

The Ink

Most inks on the market are too thick to print easily by hand and they generally need a slight amount of reduction – or thinning – to make it work better. Thinning does not mean making it softer it means adding a curable reducer rather than a "soft hand" additive. A small amount of reducer will make the ink more workable.

If your print is a three-color print, it is recommended to thin the lightest colors a little more than the darker colors. This will generally be the first color in your print and it needs to penetrate into the garment more than the others, this way, it will not pick it up on the bottoms of the other screens. If black is your last color, you can thin it less. It needs to lay on top of the other colors and it will blend in with the under colors if it is too thin.

Plastisol ink tends to get a little thicker when it isn't in use, so you should always stir the ink before you begin thinning it. By stirring the ink you will find out if it really needs thinner. We recommend an ink that is smooth and creamy to one that is so thick that you break the stick trying to stir it.

Beta-Chemical-Screen-Squeegee.jpg

The Squeegee

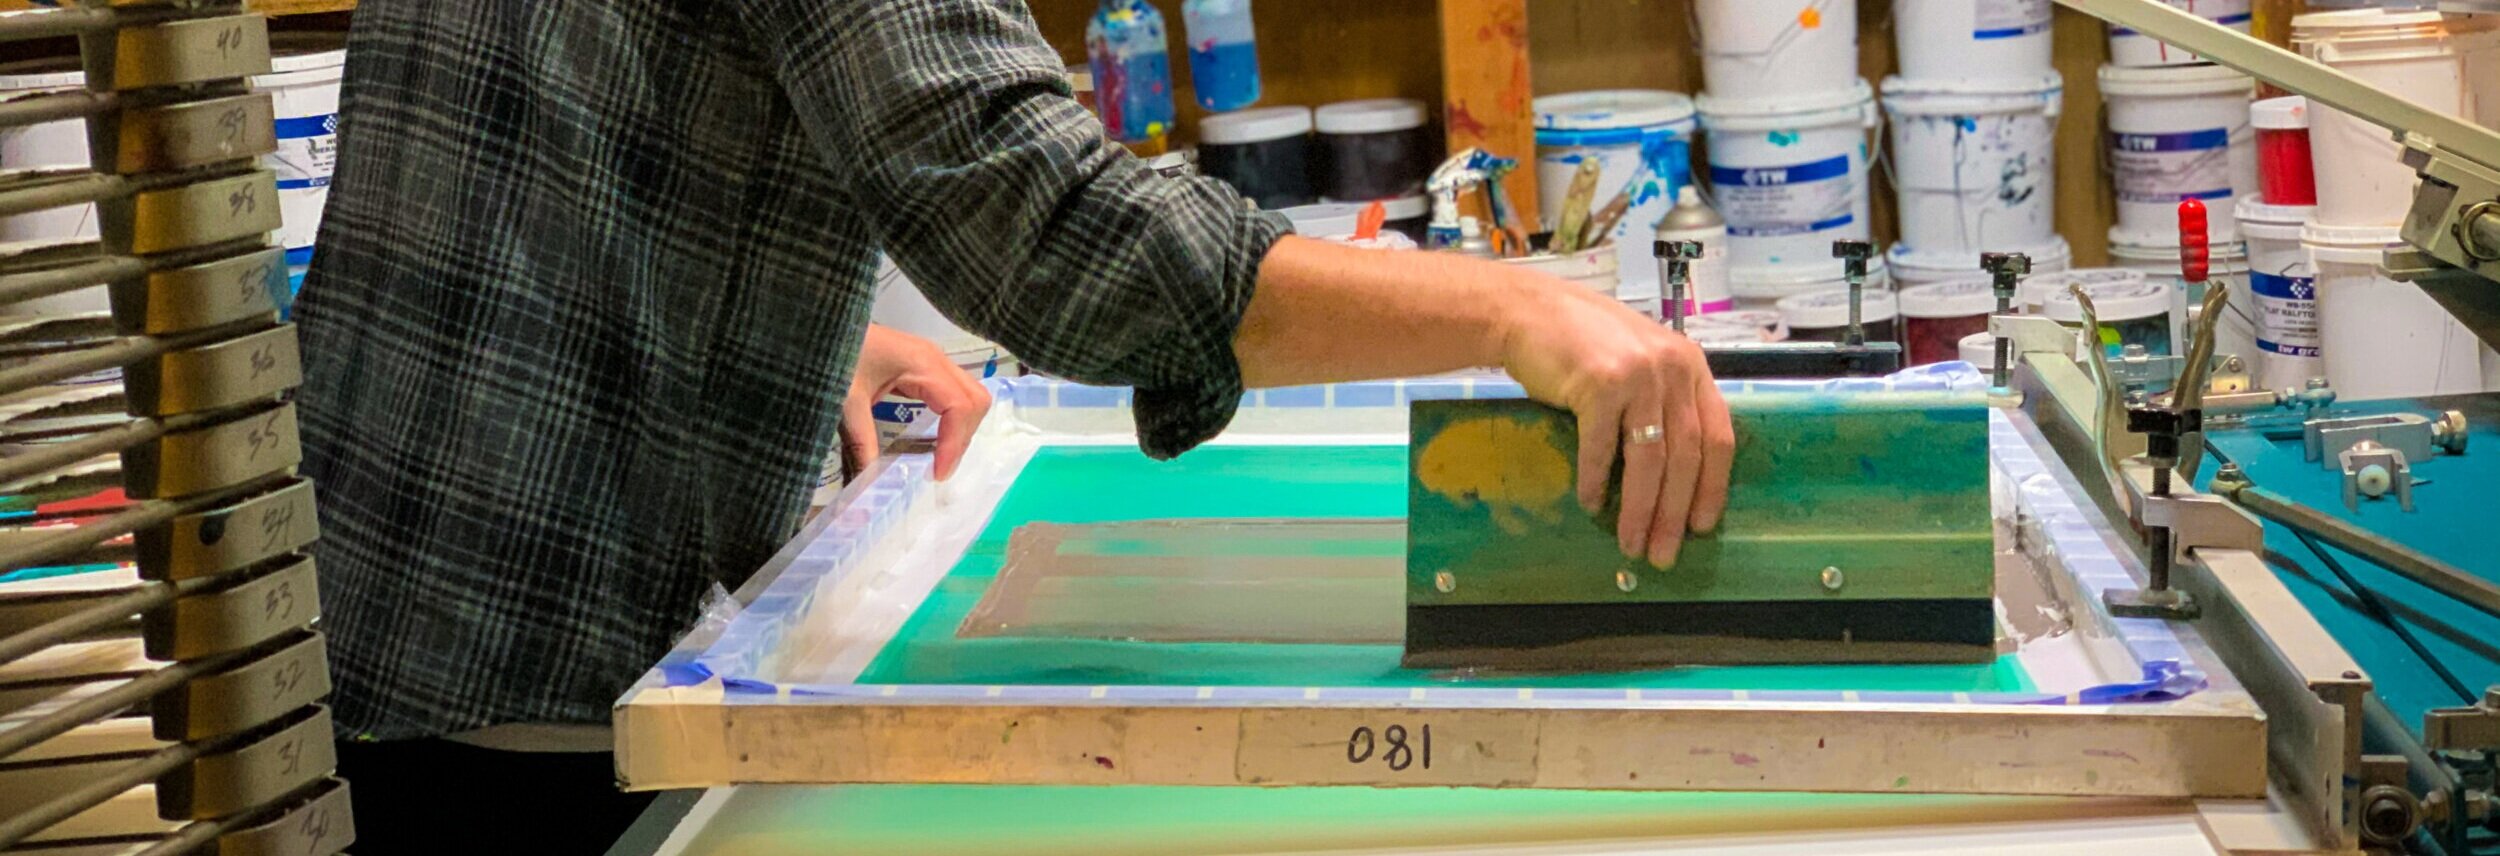
We highly recommend a triple durometer squeegee that has a harder center around a softer outer edge. These give you more control, especially if you have a lot of strength and try to flatten the blade as you make the print (you don't want to flatten the blade). You can also pick up an "old-fashioned" medium hardness blade with a sharp edge and make a great print. A sharp edge shears off the ink cleanly and will make a sharper print than a dull edge blade. If you are a messy printer, you should use the wider 5" handles. These will help keep your fingers out of the ink.

Choose the right squeegee for your screen print job

Techniques

There are technical applications we recommend and we’ll go over details as to how to print once you have your equipment all set up and ready to go.

IMG_6712.jpg

How Much Ink Should I Use?

Depending on how you work, knowing how much ink to use takes time and practice. Some people have a heavy pour but they are able to manage the printing process to avoid making a mess, while others tend to be a little less coordinated. The rule of thumb is to pour enough to get a good amount of prints without running dry, but not so much that when you print it all rides up onto the squeegee handle. It is much easier to put more ink on a screen and harder to take the excess out! Start off with a small amount and work your way up to learning how much is really needed and how much you can handle.

How Do I Hold The Squeegee?

Top Grip:

A lot of printers use the standard “two-hand, top grip and pull towards you” stroke. While this works well, it can cause some problems if you are printing all day long. Not only will the tips of your fingers and thumbs be sore (and may become numb) you may also feel tenderness in your wrists. What this could cause is a repetitive motion disorder known as Carpal Tunnel Syndrome.

Some people can print their whole lives and never get this but to minimize the chances of developing Carpal Tunnel, you can use special ergonomic squeegees that force you to hold a wider handle.

Side Grip:

This technique moves the strain from the center of your wrist to your forearm muscles. Simply hold the squeegee by the side and pull it towards you. This works great if you are a short person or of average height.

Push or Pull?

The answer to this question is based on preference. Pulling the squeegee towards you is the standard method, but pushing it away from you is really a lot easier. When pulling the squeegee you use more of your wrists and shoulder muscles. When pushing, you use more of your body weight to push the squeegee. We encourage you to try both and figure out what is most comfortable.

How Many Strokes Are Needed?

You really only need one stroke if your ink is diluted enough and you’re printing on a lighter fabric. If the fabric is dark and your ink isn’t sticking as well as you’d like, we encourage you to do two-stroke. If you find that two or three strokes are not doing the job, it may be that your ink is too thick and will need to be diluted a bit more.

How Much Pressure Do I Apply?

We recommend that not a lot of pressure is applied as this can cause the print to be uneven, if the ink is the right consistency then a medium amount of pressure should do the job.


In Conclusion

Having the right equipment is more than half of the job - buying the equipment and the ink can get expensive, however, if you have a plan and the right design, you can make up the money quickly and begin to profit from your creations.

Practise makes perfect, many techniques can be mastered by just making mistakes and starting over. So, don’t be scared to make errors and having to start over, it’s all part of the process.

Author: Irene Floridia - Content Creator


Follow us on Instagram and Facebook!

For FAQ, check out our site!

For any inquiries, send us a message!

OR

send us an e-mail at quotes@familyindustriesla.com

Our showroom at 2755 Fruitdale Street, Los Angeles, CA 90039 is open by appointment only from 10 am - 4 pm Monday through Friday.

DIY Screen Printing on a Budget

Screenrpint.jpg

So you have a great design and you want to make t-shirts but you’re on a budget and can’t afford a minimum order from a local screen printer? Well, you can get your own setup on a limited budget and we’ll show you how. In this article, we will take you through the essential materials and how to outsource some of those expensive items.

Screen Printing: The Essentials

These are the materials you will need to have a basic setup, later on, we will give you resources on how to either make your own, where to find a good deal, or best practices on how to waste less to get more.

  1. Screen - The screen has a mesh, which is the fabric stretched over the screen’s frame, and is a weave that has tiny holes in it, which allows the emulsion to harden and adhere to it, and also allows ink to pass through the mesh that is open, IE the stencil. The common sizes are 18″x20″, 20″x24″, and 24″x31″, but there are companies willing to make screens to any size needed.

  2. Press - The press holds the screen in place between prints, making it easier for the user to swap out the paper or clothing being printed.

    Learn more about Choosing the Right Screen Printing Press

  3. Photo Emulsion - This is a thick liquid substance that reacts to light. Essentially, emulsion becomes "tougher" when exposed to light, making it more difficult to remove from surfaces. The emulsion is applied to the screen, at least one layer on both sides, using a scoop coater.

  4. Stencil - Stencils are basically opaque sheets, similar to transparency sheets, that the designs are printed onto using a laser printer. The design needs to be as dark as possible so that it blocks UV light from the exposure unit to the areas behind the design. Learn How To Screen Print with Stencils

  5. Ink - We recommend using water-based ink to have the best result. Water-based ink is friendly to the environment, stays longer wet on the screen, and requires little chemicals for cleaning. This ink requires technical expertise. Another option is plastisol based Ink. This ink was the most common choice for a long time because water-based ink is more difficult to use, therefore requiring printing expertise.

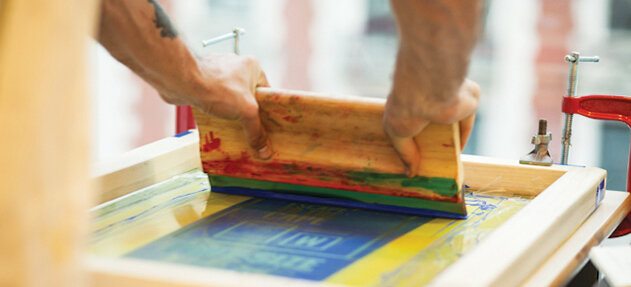
  6. Squeegee - A squeegee is a rubber blade attached to a long wooden, metal, or plastic handle. It’s used to push the ink through the mesh screen and onto the surface being printed.

  7. Darkroom Light - For this process, you will need a darkroom to be able to apply and mix your emulsion. A darkroom-safe light is necessary to be able to see while you’re preparing the screen.

  8. Exposure Light - After coating your screen with emulsion, it’s time to place your stencil on it and expose your design using an exposure light.

Check out The Art Of Making: Hand-Screen Printing


But How Do I Print on a Budget?

IMG_7366+2.jpg

We get it, the materials list is long and it’s not looking cheap! - Don’t worry, we got you! Here’s how you can cut costs on your materials.

Tip: You can almost always find some of the materials listed above on websites such as Craigslist, OfferUp, or Facebook Marketplace. This is a good way to get exactly what you need without paying full price.

Screen

With the price of lumber being low, building your own frame can be cost-effective, although screens are fairly affordable. Screens for screen printing range in price from $20 to $35 dollars, however, if you are making a print requiring more than one screen, this can get pricey. We recommend that if you’re just starting to only get one screen and begin printing single color prints.

Screen Printing Press

A press is the most expensive part of this process, it can run you anywhere from $100 to $1,200 dollars but you don’t have to have a press. Many printers have simply used a screen on a table and applied pressure with one hand while printing using a squeegee with the other. The trick is to make sure the t-shirt is placed always in the same spot.

Now, if you’re doing a large print and it requires a little more concentration, we suggest you set up on a table that you don’t mind drilling a hole into, and add door hinges to your screen and the table - this will prevent your screen from moving and you can use both hands while printing.

Ink

Inks can get pricey, but as we recommended, you can find this on Apps like OfferUp or Facebook Marketplace. Otherwise, a way to conserve ink is to minimize your use by pouring smaller amounts when printing and keep pouring as you go. This practice will prevent you from wasting ink.

Learn about What is the Best Ink for Screen Printing

Squeegee

Squeegees are very affordable and you can find a whole kit for less than $10 dollars if you buy directly from a wholesaler.

Darkroom Lighting and Exposure Light

The best way to work with the photo emulsion is in safelight conditions. A darkroom safe light lets you work with the photo emulsion in safelight conditions so that you can see what you’re doing when mixing the emulsion and coating the screen without exposing it to UV light. Because film photography is not as popular anymore, you can find a lot of Darkroom-safe lights on websites such as eBay for $20 dollars.

For exposure lights, you can go to your local hardware supply store and find 500-watt or higher halogen work-lights anywhere from $20 - $40 dollars. They generally have a black housing and clear glass lens at the front with a wire grill covering it. Start by removing the grill and glass from the front. It is a UV filter and when you expose your artwork to your screen you will want maximum UV exposure. This is a great alternative DIY exposure setup.

For a more in-depth list of screen printing materials, check out What is Screen-Printing and What Materials Do I Need?

Author: Irene Floridia - Content Creator


Follow us on Instagram and Facebook!

For FAQ, check out our site!

For any inquiries, send us a message!

OR

send us an e-mail at quotes@familyindustriesla.com

Our showroom at 2755 Fruitdale Street, Los Angeles, CA 90039 is open by appointment only from 10 am - 4 pm Monday through Friday.

What Is The Best Ink For Screen Printing?

IMG_0885.jpg

In screen printing on apparel, there are various techniques and two types of inks that are commonly used, water-based inks and Plastisol inks. So, which one is the best? Well, like many techniques in this field, it depends. In this post, we will compare the two and ultimately give you advice on the best ink for the type of print you are trying to achieve.

What is water-based ink?

Waterbased.jpg

Water-based inks are inks made with water instead of plastic or PVC, water-based inks can be split into two primary ingredients which are water and pigment. One of the main features of this type of ink is the fact that it is a more eco-friendly option. Water-based inks soak into the fabric as opposed to sitting on top of the fabric, therefore, making the print smoother and breathable. Water-based inks are better when printing on light-colored cotton, if the design has a lot of details, and if the ideal print has muted colors.

What is plastisol ink?

plasitsol.jpg

Plastisol ink is made up PVC particles suspended in a liquid plasticizer, it is very durable, flexible, and is commonly used in apparel printing. Plastisol is thick and opaque and it can be mixed easily to create just about any color imaginable. With plastisol ink, we can create special effects like suede, glow-in-the-dark, glitter, shimmer, or metallic. Plastisol is most commonly used on dark-colored fabrics, and it is ideal when printing designs that are less detailed and very colorful.

Which one is the best?

The best ink depends on what type of print, the fabric, and the design you are trying to accomplish as there as many factors to consider. Below we’ve broken-down the considerations for you to make your choice as well as our opinion.

Untitled design (1).jpg

Softness & Breathability

Water-based inks allow for a lighter and softer print which makes the fabric more breathable and comfortable, while Plastisol tends to be a lot thicker and because it is made up of PVC (or plastic) particles, and the ink sits on top of the fabric, it is less breathable around the printed area.

Untitled design (2).jpg

Color

Plastisol inks allow for more vibrant colors and a more accurate color matching process, especially on darker colored fabrics. Vibrant prints using water-based inks are possible, however, the fabric would need to be a lighter color. Plastisol is considered 100% solid, so every bit of it stays on the fabric when cured.

Untitled design (3).jpg

Durability

While both types of inks are durable, Plastisol ink has the reputation to be the most durable, however, some factors need to be taken into consideration. For example, Plastisol ink is thick and can withstand several washes before fading, although, Plastisol inks tend to crack when exposed to high heat. Water-based inks tend to fade faster with frequent washing.

Untitled design (4).jpg

Versatility

With Plastisol inks, you are able to use a variety of different types of fabrics, other inks, and additives. Water-based ink is best suited for 100% cotton fabrics. Blended textiles are less likely to absorb the water-based ink, although there are some tricks to do this successfully, you will run into a lot of difficulties.

Untitled design (5).jpg

Eco-friendliness

While water-based inks are more eco-friendly, but it’s not by much. Why? Well, water-based inks also contain plastic in the form of acrylics and other binders. they rely on solvents that evaporate, leaving the pigmented binder compounds on the garments. The primary solvent is water, but they often contain co-solvents such as formaldehyde and alcohol. These solvents can be harmful and put you at risk unless you use protective gear to protect you from evaporative fumes. Therefore, the two inks are not that much different when it comes to this issue.

Untitled design (6).jpg

Cost

In most cases, plastisol inks tend to have a lower cost. However, as more people prefer softer prints, water-based inks are becoming more popular and print shops are able to reduce their cost by making large purchases with ink vendors. Therefore, consumer prices may vary from shop to shop.


Based on the criteria above, we believe plastisol inks are ultimately the best option in most cases. It is easier to use, cost-effective, and long-lasting ink. Plastisol is sure to maintain the color and details of the design for a long time.


shirtspace-how-to-screen-print.jpg

For questions, send us an e-mail at quotes@familyindustriesla.com, or give us a call at 323.227.1547 and we'd be happy to help.

If you’d like a quote, contact us!

Our showroom at 2755 Fruitdale Street, Los Angeles, CA 90039 is open by appointment only from 10 am - 4 pm Monday through Friday.


Author: Irene Floridia - Content Creator

Merch Guide For Musicians & Bands

Whether you’re a successful musician or an up and coming band, having merch to sell at events is critical. There’s a variety of items you can sell as merch to event goers as a way to promote your music. Choosing the right items is key to ensuring sales.


Why Do Musicians Need Merch?

Musician merch has always been important to bands, both as a source of revenue and to help raise awareness of your ‘brand’. Fans love buying merch too - the music we like is closely tied in with our identity, and wearing a band’s t-shirt is a way of showing off that identity to others - adverts for your band, helping promote your band anywhere and everywhere they go.

Having a good range of merchandise not only generates you income but raises your profile as a band and can help get you new fans!

Check Out How To Design A T-Shirt

What Merch Should You Sell?

The real key to getting started with merchandise is to look at how much budget you have to invest. If you have a larger budget it is worth looking at what your fans would like - ask them and develop a small range, but you could also go for plenty of low budget options such as badges, stickers and posters. Your budget will also play a crucial role in determining what your inventory will look like.

Ask Your Fans

You can slap your band logo on just about anything these days, but don’t leave it up to chance. Be direct and ask your fans what they want! Put up a quick poll on your social media, in your email newsletter, or on your music website to get an idea of the kind of merch your fans would actually enjoy.

Research

Check out other band’s merch - Gather merch inspiration from bands that are similar to yours in terms of genre, brand identity, and number of followers.

Check Out Merch Ideas: Band Posters & Art Prints

Cost Effective Merch

When you’re deciding what to get made, cost is always going to be a factor. There are three main things to bear in mind:

  • Overall cost of production: Patches, stickers, and keychains are popular because they’re a low-cost items that you can give away as well as selling them. By contrast, hoodies are a more expensive item that will cost more - however, the profit is bigger.

  • Minimum runs: All items will have a minimum quantity that you’ll be allowed to order. This will be higher for some types of merch than others.

  • Complexity of design: If you’re screen printing items (the most common technique for t-shirts), you’ll be charged a set-up cost for each color in your design - meaning a complex design with 4 colors will be much more expensive to produce than a simple 1 color print.

Find A Designer

Creating the right attention-grabbing artwork is a big part of a successful merch campaign. Hiring a professional graphic designer can save you a lot of headaches when it’s time for the printing process. It’s important to communicate what you are intending to do with the art work as certain designs may not be suitable for screen printing (too detailed or thin lines).

Finding a merch designer that specializes in packaging or has knowledge of apparel printing is a plus! Otherwise, make sure they understand what your intentions are before beginning the designing process.

Check Out How To Design Artwork For Screen Printing With Puff Ink

Custom Merch

Adding an element of customization to music merch item can be a great incentive for event goers. Being able to add initials to a jacket or a hat by using a live embroidery service is a low cost way to customize merch on-site.

If a live event merch customization agency can fit into your marketing budget, do it! Having experts working at your event either embroidering hats or screen printing t-shirts adds an additional element of entertainment to your show which encourages sales.

Selling Merch Online

While not on tour, selling merch online is another way to earn passive income and still promoting your music.

If you’re attracting fans to your website or Instagram profile, it’s a missed opportunity if you’re not offering them stuff to buy once they’re there. Services like BigCartel give you a free shopfront where you can easily add your products and have fans pay by Paypal. You just need to keep track of stock levels, and make sure one band member is in charge of packing and shipping the orders.

Another solution is merch agencies such as Family Industries who offer a variety of merch items that can also be fulfilled on-site and shipped directly to the buyer. Merch manufacturers can often also add additional branding items such as stickers or personalized notes and they guarantee great quality.


Be Creative!

Selling a t-shirt with your band name and artwork is essential, however, thinking outside the box and offering a vinyl with an art print can elevate your brand and ensure you’re providing quality to your fans. It may also additionally present as a great gift for someone, which automatically takes your merch to the next level.

Author: Irene Floridia - Content Creator


Follow us on Instagram and Facebook

For FAQ, check out our site!

For any inquiries, send us a message!

OR

send us an e-mail at quotes@familyindustriesla.com

How To Design Artwork For Screen Printing With Puff Ink

Puff Prints are here to stay, and there’s certain design rules to follow to ensure your puff print looks perfect. In this article, we’ll take you through some of the design choices that can make your print stand out and some techniques we feel are essential when designing artwork to be screen printed with puff inks.


What Are Specialty Inks?

Specialty inks refer to specific print finishes. For example, reflective inks, glow in the dark inks and our favorite, Puff Inks. These inks help with making your screen printed designs stand out from the norm. Now, these inks generally require an additive, for inks to create that “puffy” look you will want to select your regular plastisol ink in the color you would like to print and then add a Puff Ink additive which is then mixed with the pigment.

Learn more about Foils and Metallic Prints

So, Does printing with puff ink require A special set up?

Besides mixing the puff additive with your ink and some technical file setup, the process is somewhat similar to other forms of screen printing.

One of the main setup rules are ensuring that there is enough puff ink laid down on a garment in order for it to expand enough to notice, a general rule of thumb is to not have any lines or small details in your artwork that are less than 1pt.

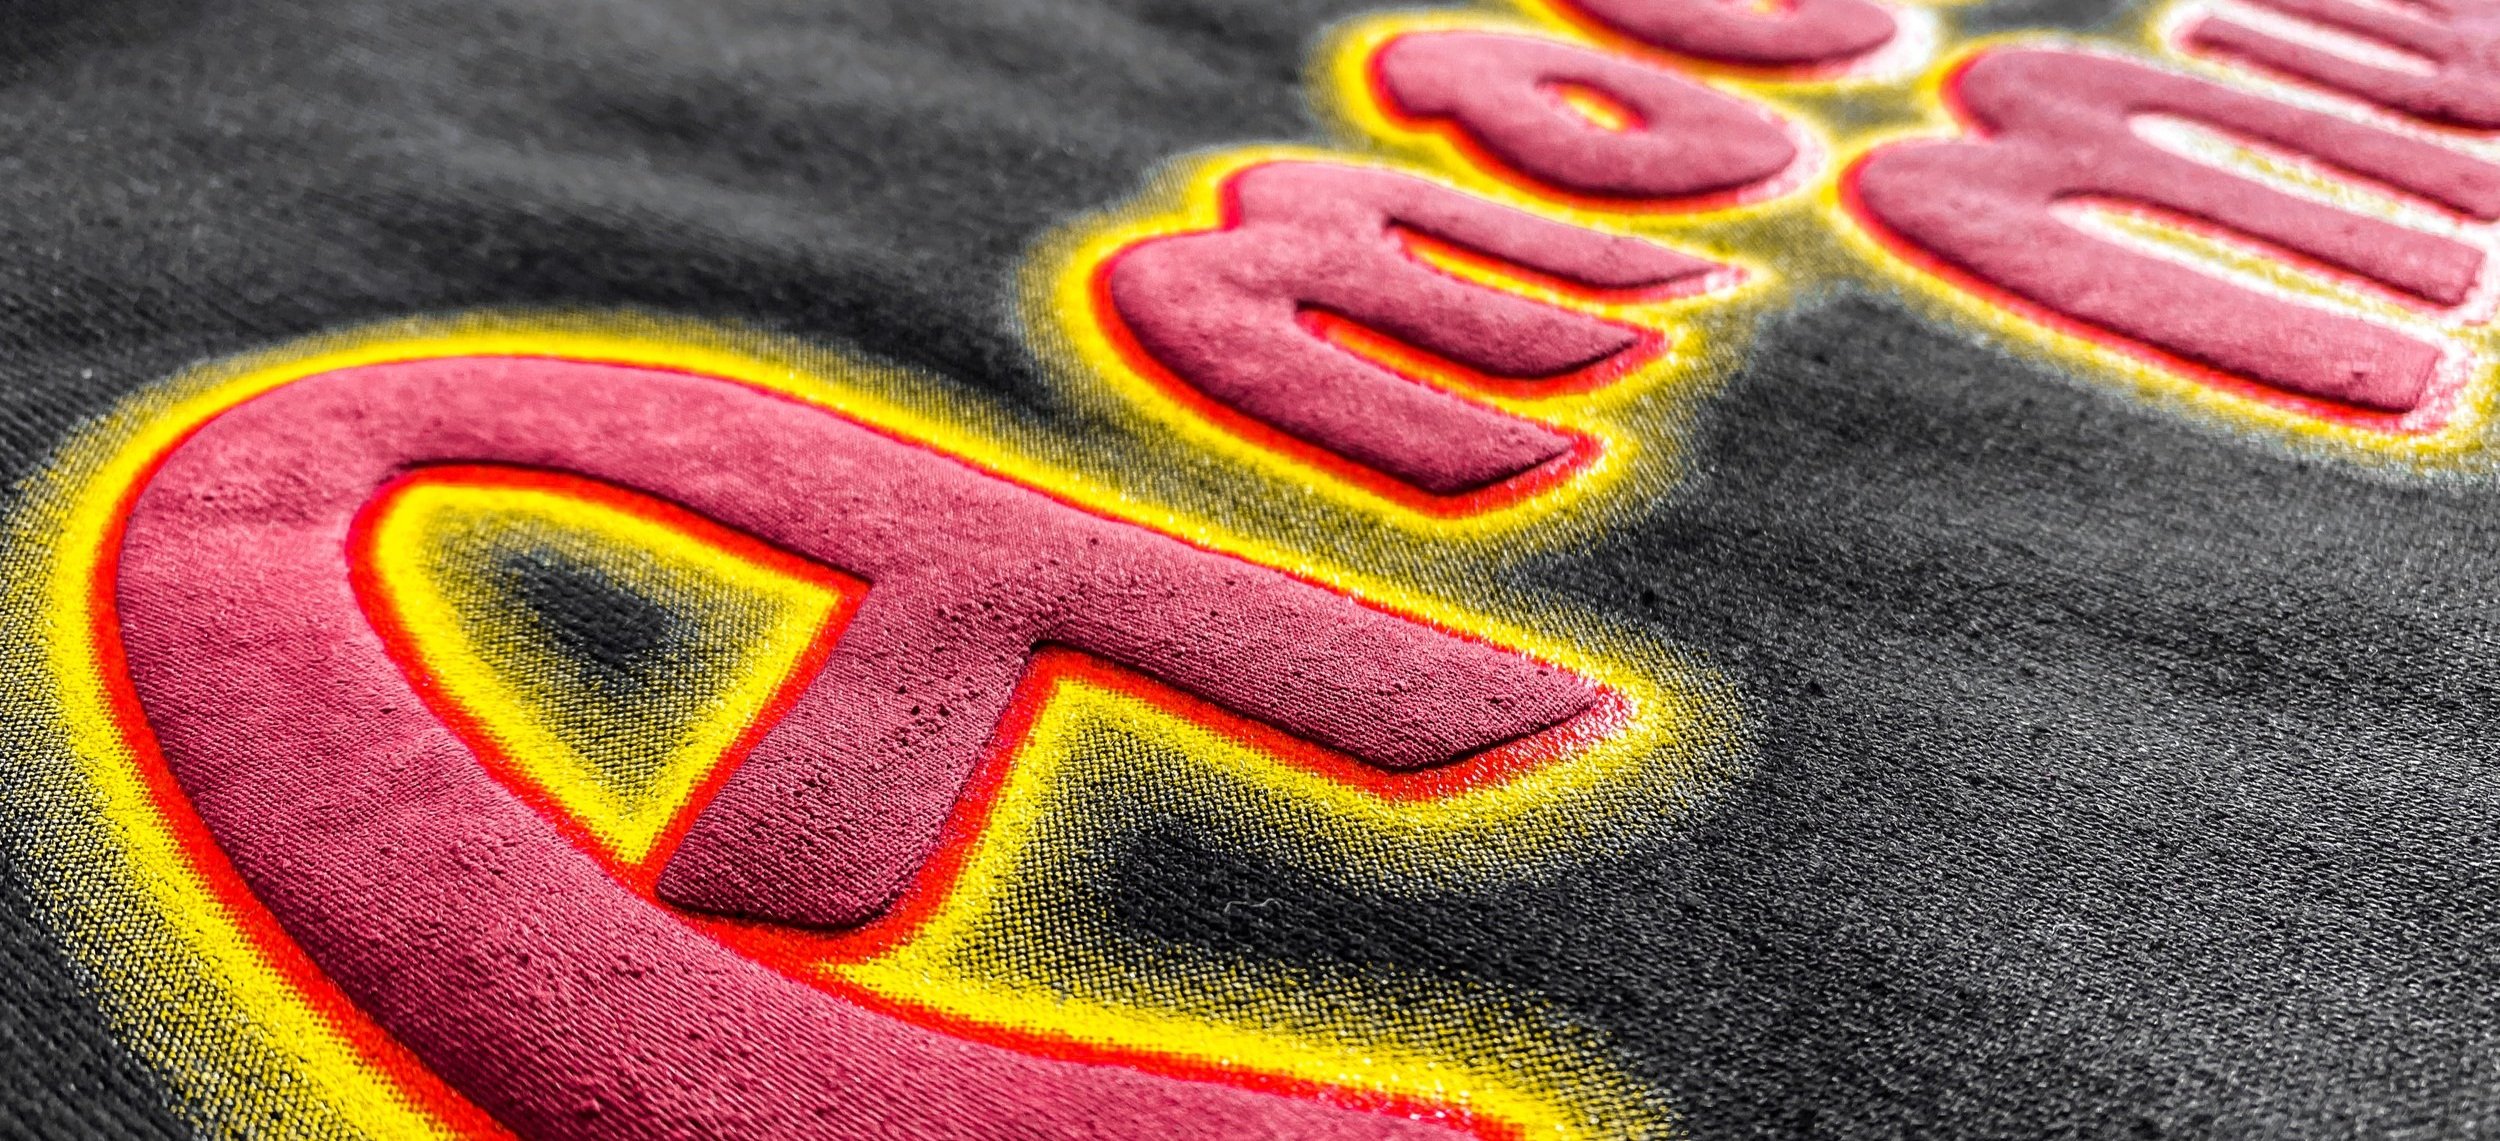
Before puff ink is exposed to heat, it sits flat on the garment like any regular plastisol ink. Heating the finished design (usually by sending the garment down a curing oven) will activate the puff additive and enable the ink to rise and expand about one to two millimeters on all sides.

One important tip we can give you is to prepare for color loss. Because puff ink is an ink additive, it will dilute your plastisol ink color. You can offset this either by starting with a bolder ink color than you planned to use, or if you’re color matching or trying to achieve a brighter color, lay down your puff additive/ink mix, flash the ink lightly without activating the puff additive, and print another layer of undiluted plastisol ink.

Testing Puff Ink Additive

PUFF REQUIREMENTS:

  • Halftone: 20 lpi

  • Line Weight: 1pt minimum

  • Max Art Size: Check with print shop what the maximum art size is as this changes from factory to factory. As a rough guide, an A3 page size would equate to a large chest print for a men’s garment.

  • Image File Types: Most print shops will accept .psd, .tif, .jpg, .gif and .png.

  • Vector Art File Types: Vector PDF, EPS, AI or CDR Files.

Learn more about How To Prepare A File For Screen Printing

Creative Uses of Puff Ink

Because puff ink does not activate until heat is applied, it allows for you to experiment with different design ideas. However, if you’ve never done it, make sure to consult with your premium screen printing shop.

Multi-Color Prints

When you have a print with several colors, you can add a puff effect to one of them, creating a more dynamic print.

Gradients

a 3 color halftone gradient printed in puff ink is totally possible! By thinking outside the box. Take a simple typographic logo and inject visual interest, tactile feel and a higher perceived value for your garment in one ingenious print.

Placement

You can play around with placement in any way you would like, this gives you the ability to print puff on sleeves, back or front of the garment. Puff can also be applied to accessories like hats.

Learn more about Different Screen Printing Techniques

What Not To Do with Puff Ink

  • Don’t use puff additive when screen printing fine detail. Some of the detail of your print will be lost when your ink puffs up in the dryer. While some level of image detail is possible to achieve with puff inks, images with extremely fine detail will be lost.

  • Don’t print abutting colors. Similarly, puff ink doesn’t work when printing two colors that register right up against each other. The fine edge will be lost to the puff effect.

  • Don’t over cure your puff ink. Be careful to follow the manufacturer’s instructions on curing your puff ink.

Author: Irene Floridia - Content Creator


Follow us on Instagram and Facebook

For FAQ, check out our site!

For any inquiries, send us a message!

OR

send us an e-mail at quotes@familyindustriesla.com